Create a ClickOnce Virtual Directory
- ▷
- You are on the target machine.
- ▷
- You have successfully imported the Web Application in IIS and, created the devices, documents, graphics, libraries, and profiles, and shared virtual directories.
- 1.
- To create a ClickOnce virtual directory, you must first obtain the brand name of the product. To do this, proceed as follows:
a. Open the SMC, and from the Header bar, select Menu > About.
b. From the About dialog box that displays, verify the Product name. For example, Desigo CC .This is the brand name.
- 2.
- Open the Internet Information Services (IIS) Manager.
- 3.
- Select the Web Application that you have imported and right-click, and select Add Virtual Directory.
- ⇨
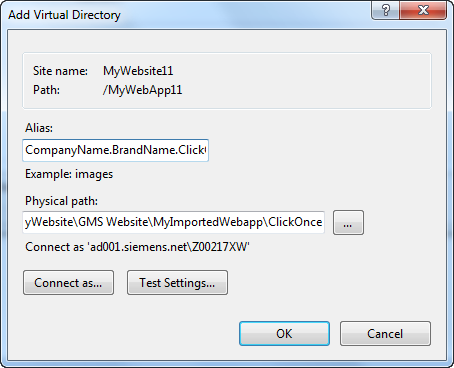
- The Add Virtual Directory dialog box displays.
- 4.
- In the dialog box, do the following:
a. Provide the Alias as [Company Name. + Brand Name + .ClickOnce]
NOTE: Remove any whitespace in the brand name.
b. Provide the Physical Path by browsing to the ClickOnce folder of the imported Web Application on the third-party machine. Provide the physical path as the path of ClickOnce sub-directory under web application directory on the target machine.
- 5.
- Repeat Steps 5 through 12 from Creating Virtual Directories for Web Application in IIS on Target Machine.
- ⇨
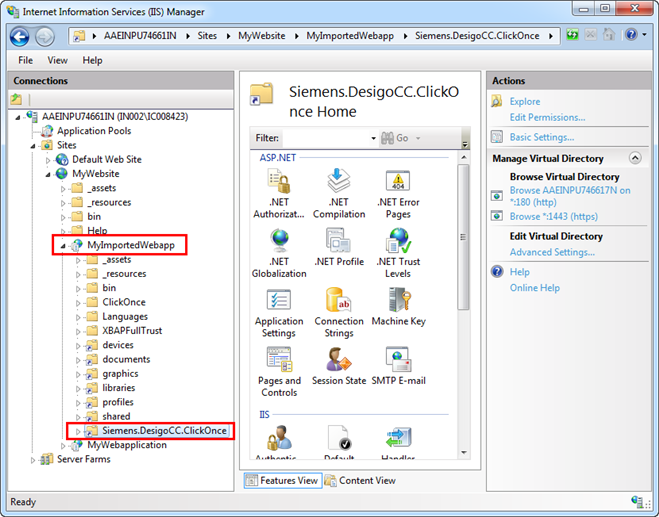
- The ClickOnce virtual directory is added under the Web Application node in IIS.


