Editing a Web Application
Before editing a Web Application, you must ensure that the Web Application Pool version of the source and target machine matches. If the Web Application Pool version does not match, you must create a new one that matches the settings on the source machine. The following procedure describes how to do this.
- ▷
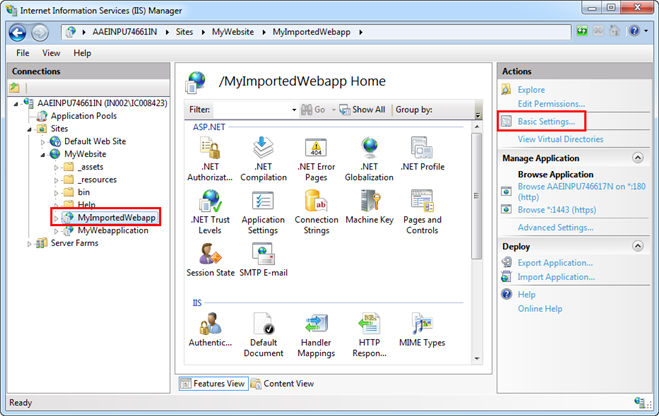
- IIS is opened and you have selected the imported Web Application in IIS.
- 1.
- In the Actions pane, click Basic Settings.
- ⇨
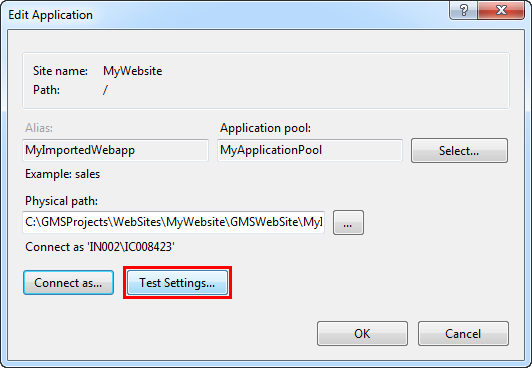
- The Edit Application dialog box displays.
- 2.
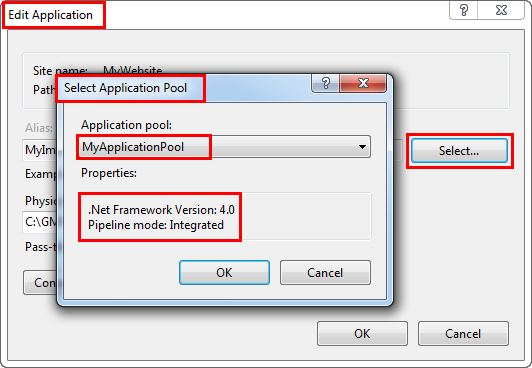
- In the Edit Application dialog box, click Select.
- 3.
- In the Select Application dialog box, you must verify the following:
- -
- Ensure that the version of Application Pool: .Net Framework Version and Managed Pipeline Mode is the same as the application pool version on the source machine.
- -
- (Optional and required only when the Application Pool version does not match with the source machine) Create Application Pool.
- -
- Click OK.
- 4.
- In the Edit Application dialog box, click Connect as.
- 5.
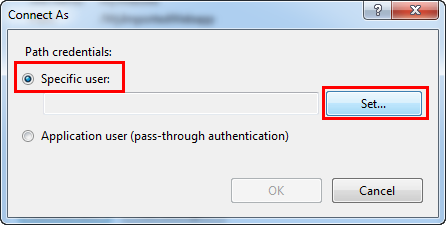
- In the Connect As window, select the Specific User option and click Set.
- ⇨
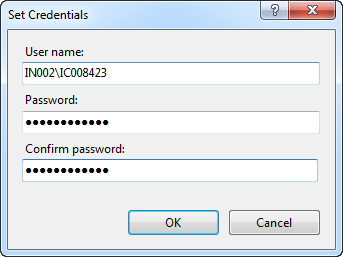
- The Set Credentials window opens.
- 6.
- In the Set Credentials window, enter a user name (domain user credentials with which you have shared the project and virtual directories) and a password and confirm it.
- 7.
- Click OK.
- 8.
- Click OK in the Connect As dialog box.
- 9.
- In the Edit Application dialog box, click Test Settings to open the Test Connection dialog box.
- 10.
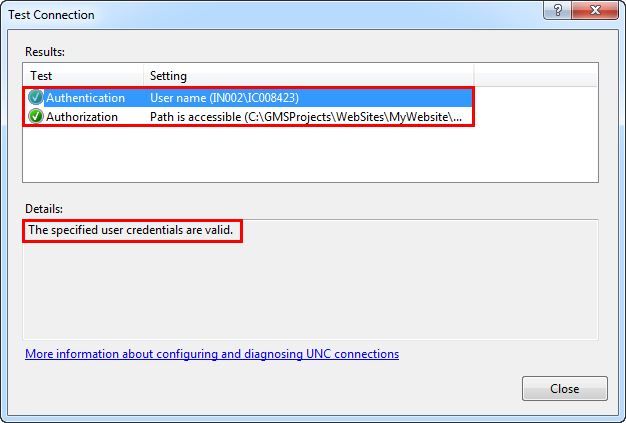
- In the Test Connection dialog box, ensure that both results—Authentication and Authorization—are successful and the message The specified user credentials are valid displays in the Details section.
- 11.
- Click Close to close the Test Connection dialog box.
- 12.
- Click OK to close the Edit Application dialog box.


