Installing IIS on Windows Server 2016
- 1.
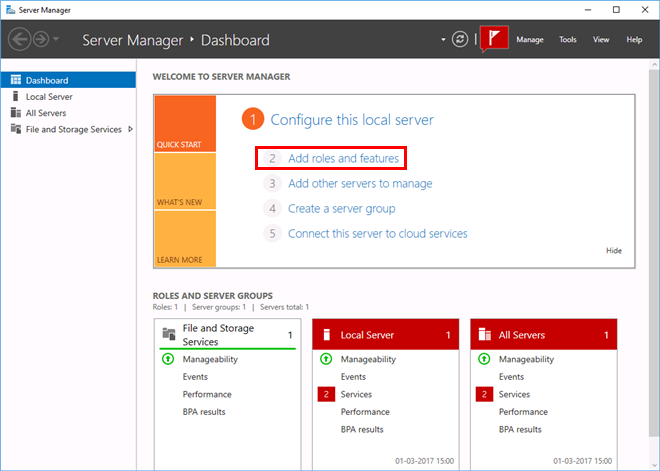
- If Server Manager is already open, go to Step 2. If Server Manager is not open, use one of the following methods:
- -
- On the Windows desktop, click Server Manager in the Windows taskbar.
- -
- On the Windows Start screen, click Server Manager.
If it’s not there simply type Server Manager in the Search.
- 2.
- On the Manage menu, click Add Roles and Features.
- ⇨
- The Add Roles and Features Wizard dialog box displays.
- 3.
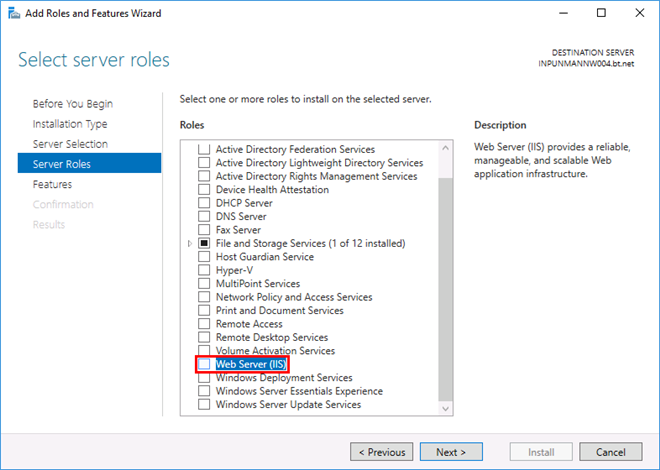
- In the Add Roles and Features Wizard dialog box, click Next till Server Roles is selected.
- 4.
- In Server Roles, do the following:
- -
- Select Web Server (IIS).
- -
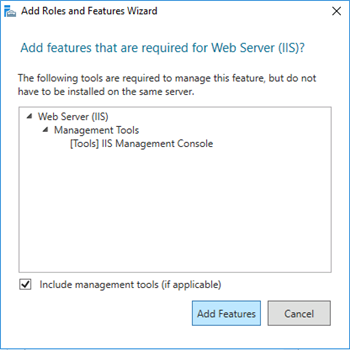
- This opens a dialog box asking you to confirm addition of IIS Management Console in the Management Tools of the Select role services window. Click Add Features.
- -
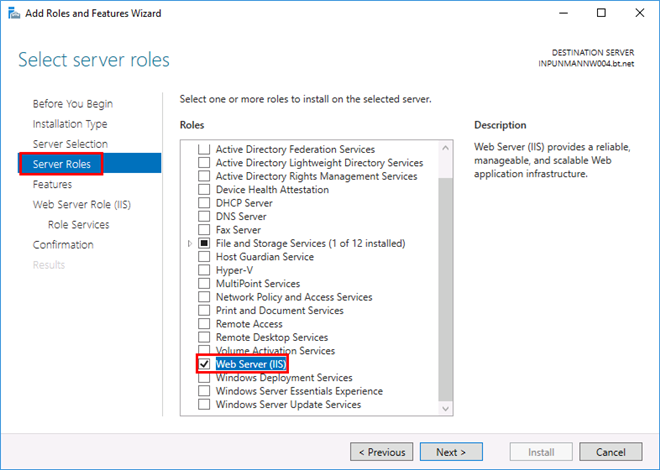
- Web Server (IIS) is selected.
- 5.
- Click Next until Role Services is selected.
- 6.
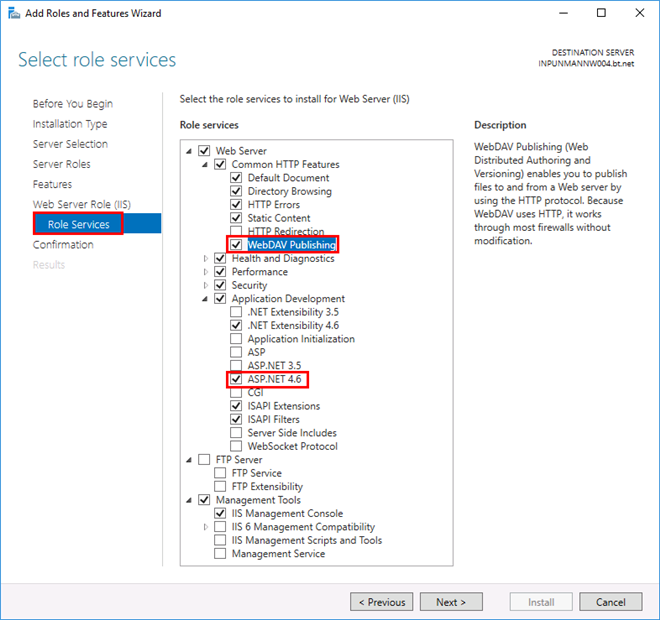
- In the Select role services window, proceed as follows:
- -
- Expand Web Server > Common HTTP Features, and select WebDAV Publishing.
- -
- Scroll down and expand Application Development, and select ASP.Net 4.6.
- -
- This opens a dialog box asking you to confirm addition of additional features that required to be installed for ASP .Net 4.6. Click Add Features.
- 7.
- Click Next.
- 8.
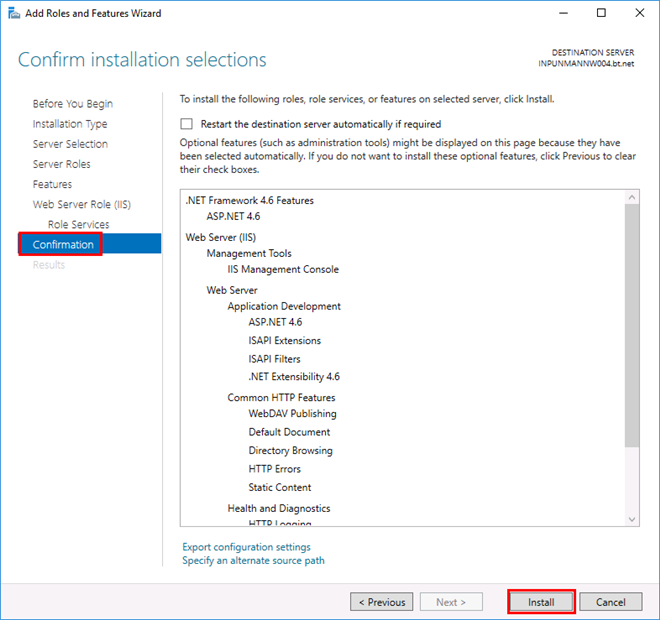
- The Confirm Installation Selection dialog box displays.
- 9.
- Click Install.
- ⇨
- The features are installed and IIS is configured.
- 10.
- Click Close.


